Mar
15
 Hello and welcome to MakeRoom’s March 2012, hot off the presses, blog entry dedicated entirely to curtains! Before we dive on in to the wonderful world of window coverings, I need to make a few confessions.
Confession #1:
I am a LAZY sewer. In theory I really enjoy sewing; picking out fabric, making things exactly how I like them, and of course the end product. But as far as for the actual act of sewing….meh, I could take it or leave it. Well, really I’d rather leave it, but given confession #2 (see below), I am forced to rely on my own labor. And, I CAN sew, I’d even rate myself as an intermediate sewer, but a patient or thoughtful sewer, uh no. In a nut shell, I am always looking for ways to minimize the sewing in a project.
Confession #2:
Apart from buying shoes and hair product, I am cheap, cheap, CHEAP. Spending 100’s of dollars on window covers just isn’t going to happen. Farming out my sewing duties to a seamstress is a no go. So, I’ve developed a few tips and tricks to cut the cost down for custom curtains and other projects that use a large amount of fabric.
Okay. I feel much better. Now on to the good stuff.
Curtain #1- My Kitchen Window, or, It Don’t Get Any Easier Than This.
If you read this and think this is difficult, I am truly sorry, I cannot help you. Stop reading and just go pin up a bed sheet and call it a day.
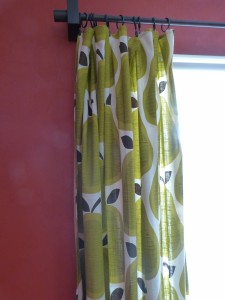
The curtains in my kitchen are two tablecloths purchased at Target. I told you this was an easy one. To avoid ANY sewing I purchased curtain rings with clips (at IKEA). THEN to take it one no sew step further, I went so far as to hang the curtain rod at such I height that no shortening or hemming was required (well, okay, I asked Bryan to hang the curtain rod because I also hate measuring, I guess that’s confession #3). Done and done. In my last house I did a similar thing with brightly colored cotton dish towels. I hung a simple rod at the midway point of the window and then again using clips, attached the towels. This made for very cute cafe style curtains. The same could be done with large cloth dinner napkins too.

Curtain #2-My Giant Living Room Window
Okay, this window is massive and faces West. Direct West. Before we had curtains in here you pretty much needed to wear SPF 50 in our living room in the afternoon. But, as a new, flat broke, home owner I was left with the conundrum of how on earth was I going to be able to afford enough fabric to cover this thing? Well, the solution turned out to be pretty simple. Sheets. King sized sheets, to be exact. I used a striped set for the front, and then as I was concerned about sun damage, I bought inexpensive blackout material for the back from the fabric store. You could also use a set of plain white sheets, but I would only do this for windows that don’t get a ton of direct sun light. To minimize sewing, I capitalized on the existing nicely finished edge of the sheet. You know, the part you usually fold down when making a bed. This is the bottom of the curtains. I used hospital track as a curtain rod- hospital track provides a nice clean, no frills, look which is what I wanted for this room. Track and clips to attach curtain yet again purchased at IKEA.
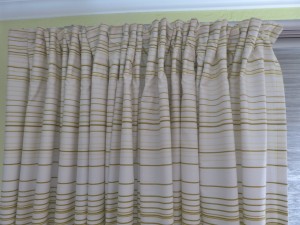 In the interest of full disclosure, this project was kind of a pain due to the shear volume of fabric I was dealing with. If I did this again, I’d recruit an extra pair of hands to help with the measuring and hanging. That being said, I am very happy with the outcome, and it came in no where near the cost of what custom draperies would have been.
Oh, and a little design tip, if you are using a striped fabric and want a more modern look, try running the stripes horizontally versus on the traditional vertical.
Curtain #3-Curtains at Work
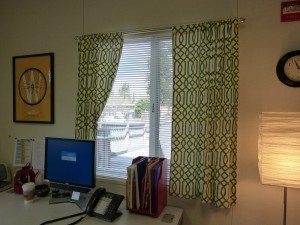
When I moved to my current office two or three years ago, I was over the moon to have not one, but TWO windows! I had spent the five years before that in a window-less office, and its sad little solar tube did nothing but taunt me when for one mere hour a day it actually let in some sun light. Anyways, my new office and windows were reason to celebrate and I resolved to make myself some curtains for them both. So back to the linens department I went. And there I found a lovely duvet cover to use for my curtains. Handily the back panel of the duvet was white, so I was able to re-purpose this as the lining. Most of the time I line my curtains, they hang better with a lining and block out more light. Bottom edge of my curtains are again the pre-exisiting finished edge of the duvet.

“Drawing” to a Close…
Don’t limit yourself to the fabric store, or to buying pre-made curtains. Fabric can be found anywhere and you don’t need to be a master seamstress to bust out a few curtains.
Until Next Time…
Next month I’ll a have step by step tutorial for making your own simple lined curtains. So look around and see if you have a window or two that could use a little sprucing up!








Recent Comments