20
The Storage Wars-Part 1
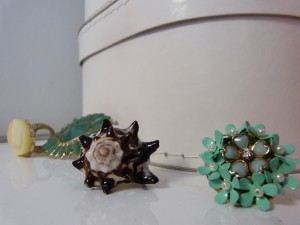 Well, it’s a new year, and like many of us, January brings with it for me a frenzy of, “Let’s get organized!” So I thought for my first official Make Room post I would tackle the issue of home organization, or as I am referring to it, “The Storage Wars”.
I would like to start by stating that my house is not large. It was built in 1949 which means that its two bedrooms and three closets are small. Its saving storage grace is a large garage and yard. This has allowed us to convert a portion of the garage into an art studio and to build a garden shed. Even still, a person can’t realistically store items such as their extra linens and cook books in the garden shed, so storage in our actual house still remains problematic. In addition, our home is occupied by three adults, two dogs, and four chickens (okay, the chickens do live outside). All of who come equipped with a bevy accessories, and “stuff”. It doesn’t help matters that the humans that live here are incredibly talented and interested in a WIDE variety of things. I mean really, an amp hidden behind the couch, a food dehydrator in the art studio, three sewing machines and six bicycles? Never mind the potter’s wheel, my ridiculously large shoe collection, a variety of musical instruments stashed here and there, fifty pounds of chicken feed, dog crates, camping equipment, the threat of beer making on the horizon …well, you get the idea. We’ve got baggage. Just when I think the war has been won, one of us brings home some new fabulous item, immediately I think, “Wow! I’ve always wanted a [insert item] ! Now where the hell am I going to put it?” And so, the war rages on.
Over the years I have developed a few, let’s call them, “principles” of home organization. Today we focus on one.
Principle of Home Organization #1- If it’s pretty enough to wear, it’s pretty enough to display
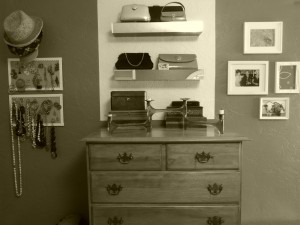
Jewelry. Purses. Sunglasses. Scarves. Shoes. Hats. I’ve got them all in spades. Many times when we have limited storage, things get shoved in places that are hard to access, leaving us wearing or using only the things we can easily get at. I try to avoid this. And one way I accomplish this is by using storage that actually displays my most attractive or unusual accessories. And why not? If I think it’s cool enough to wear on my person, certainly it should be attractive enough to hang on the wall as art, right? THEN, this provides the added bonus of freeing up space in my drawers, closet, jewelry box, etc for my less attractive items. It’s a win-win. Easily accessible accessories, more storage space, cool wall art. So I guess that actually makes it a “win-win-win”, even better!
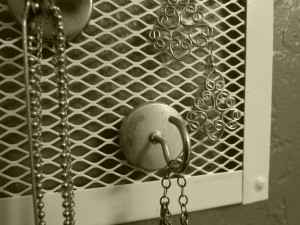 Here’s a closeup of my jewelry holder. Notice its uncanny resemblance to a galvanized metal grate… I hang earrings on it directly and for necklaces I got these magnetic hooks at the home improvement store. On the back of the grate, er, I mean fancy jewelry holder, I put an additional magnet behind each hook for added strength. You could glue the hooks in place, but this way I can move them around as I see fit. On each back corner I have stuck a self adhesive rubber foot, you could also use one of those felt things you put on the bottom of furniture. Either way, this allows the holder to stick out from the wall, making it easier to hang things on it.
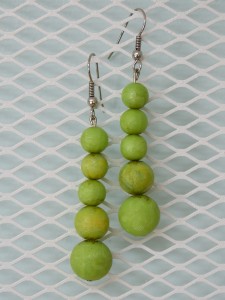
I spray painted my jewelry holder with a few coats of white, high gloss enamel. Please give around of applause for the lovely earrings featured here, fashioned out of an old necklace by my good friend Stephanie. What a clever girl.
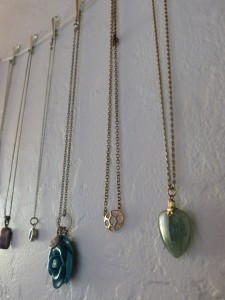
Again with that clever Stephanie. Here she is using jewelry clips on a cable suspended between two finish nails to display and store her necklaces. Cute, creative and cheap!
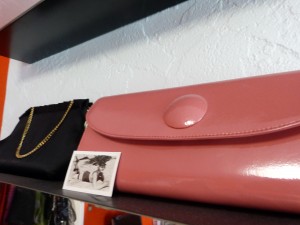
And then there are the purses. Oh boy. Some might say I have a few too many. I say no! They are my friends! Keepers of memories of fabulous nights out and spectacular events. No way, I will work this out. And viola, I did. Behold my stunning purses displayed on equally stunning mirrored shelves (courtesy of Target). I painted a rectangle of light blue paint behind the shelves to set them off, and provide the idea of a frame. By the way, during the course of this project I discovered Frog Tape. I about wept with joy when after using it to paint my blue rectangle, I removed it to find clean, crisp edges. And on textured walls! Uh-mazing.
And last but not least is my collection of glamorous pins. All of these I inherited from my incredibly stylish grandmother (it must be where I get it from). Here you see them displayed in a frame. This frame was purchased at the thrift store for  an entire dollar. I painted it white, removed the glass, covered the cardboard insert with batting and then a fabric remnant I already had. Fabric and batting is secured to the back of the card board with plain old masking tape. Hang it on the wall, stick pins in and you are done. Besides freeing up some storage space in my jewelry box, I see these everyday and think of my grandmother, and what a classy lady she was.
Stay tuned for Storage Wars-Part 2 where we will be applying a similar principle to the kitchen. Thanks for stopping by!

Recent Comments